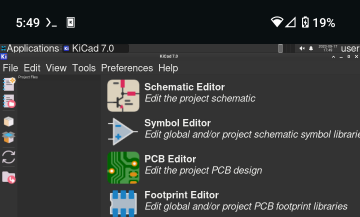
KiCad on Android: The PCB Design Setup No One Asked For

What life? Why exist? How live? Why do I mean?
If you find yourself asking asking these big questions, you're probably a robot. No offense, ChatGPT.
A real human would be asking much more important questions of themselves:
How the heck do I run KiCad on Android?
Because there's nothing more important in life than running an open-source EDA suite on your smartphone.
Whether or not that assumption is correct doesn't really matter. Considering that the universe will probably
expand and collapse an infinite amount of times, that means that KiCad will be created an infinite amount of times
as well. If you don't believe me, see the infinite monkey theorem.
Somewhere, sometime, it was bound to happen: A bored 15 year old gets the best open-source PCB design tool
to work under a mobile operating system.
BUT WHY!?
In times like these, it's best not to ask why, but how!
That's Micha-speak for "there's absolutely no reason and I just felt like it".
So here it is:
KiCad on Android: The First Guide Ever

Note that I've taken care so that this guide can be followed even if your phone/tablet is your only device. If you have a computer
on hand that you can/want to use, you should be able to omit the steps involving Shizuku and simply run the command mentioned in
that section over ADB on your computer.
Prerequisites
- A somewhat modern Android phone or tablet. It does not need to be rooted.
- Termux installed on your device, with storage set up (see its wiki, tl;dr:
termux-setup-storage) - The AVNC app from F-Droid
- About 8GB of free space for KiCad with 3D models
- Basic experience working with the terminal
Shizuku, a rootless privilege escalation system. This
might be optional for your device, but I got an error code 9 while setting up TermuxArch, and the only on-device way I can think
of to fix it is via Shizuku. Make sure to read [the instructions](https://shizuku.rikka.app/guide/setup/
start-via-wireless-debugging) on how to set it up, as I won't be covering that here!
Instructions
Open Shizuku. Select "Use Shizuku in terminal apps". Press "Export files" and select your Termux home directory from the sidebar.
Open Termux and run nano ~/rish. Go to the end of the second-to-last line of the file (use Termux's arrow keys) and
change "PKG" to "com.termux". Save and exit with Ctrl-s and Ctrl+x. Run sh ~/rish. Now, within the ADB shell, run/system/bin/device_config put activity_manager max_phantom_processes 2147483647. This will disable the phantom process killer,
which gets in the way of the next step. If there are no errors, press Ctrl-d to exit. Next, runcurl -OL https://TermuxArch.github.io/TermuxArch/setupTermuxArch && bash setupTermuxArch to install an Arch Linux environment.
After it's done, you'll be in your new Arch installation. Run passwd user and set a password you'll remember. After that, runsu user to change to the default user account.
You're nearly there!
Run sudo pacman -Syu xfce4 xfce4-goodies tigervnc KiCad KiCad-library KiCad-library-3d and press Y when prompted. Finally,
you can run vncserver :1 and connect via AVNC - the address will be 127.0.0.1:5901. Now, go to the menu in the top left,
hover over Science, and tap on KiCad. Now, revel in the glory of running an app in a place it was never meant to be run!
To start it after the initial installation, open Termux, run startarch, run su user, and then run vncserver :1.
Tips
You can change the XFCE font size by going to Applications > Settings > Settings Manager > Appearance > Fonts > Default Font and setting the size at the bottom of the dialog. I set mine to 22.
You can also set AVNC to use touchpad mode, where your swipes on the phone screen move the cursor in the direction of the swipe
instead of to your finger's exact location on the screen. It's hard to explain, but it's handy on a small screen. To do this, go
to AVNC and press & hold on your saved connection (save it if you haven't done so, it won't work with a one-time connection). Tap
Advanced and change "Gesture style" to "Touchpad". Press Save in the top right and connect. Now, your cursor will use relative
motions instead of absolute ones - handy!
Someone asked me if you can use an external mouse with this setup. There's no reason why you couldn't, so just connect it via USB
or Bluetooth. The same should also work for a keyboard.
Termux likes to gobble up your battery, so when you're done and have saved your KiCad project, go to your notifications and kill
the Termux session from its notification.
Enjoy!